Lets Make a Display Table!
In 3 or 4 parts with an optional corner piece
In 3 or 4 parts with an optional corner piece
So a while back I started to build a Table for all my dolls to be displayed on. (Well when I got around to building them backgrounds.) But some where along the way I just sort of..... stopped. I got half way though! But now I am Determined to Finish it! So I'm starting this journal to boost my morale! My dolls Will have a Beautiful Home!
The Look!
Originally my table was to be 3 parts. 2 Cabinets and a Drawer set. But since them my doll family has grown.... A LOT. So now I'm thinking 2 cabinets and 2 drawer/cubby sections with an optional corner section. The Drawers to hold maintenance items (like extra cord, pullers, forceps, head masks, etc.) and small parts (extra hands, feet, and small accessories). The cubby will also have optional adjustable shelves!
I also didn't want a table to small so that everything looks cluttered when on display. But I also didn't want a table too big so everything has its own free space. I wanted it to look cozy, livable. And since I will actually be building all of my items I made cardboard mock-ups of the things I want to be displayed. That way I can just arrange them as I finish building them. Plus it helped me decide size and shape.
Space was important also. When I started this I lived in a small 2 bed apartment with 2 small dogs. I wanted my table to be 6ft long, 3 1/2ft tall, and 2ft deep or so about. That's a lot of space. And I have to put it in a place my dogs cant jump high enough to knock things over. Luckily I have such a space (after severe re-arranging that is.) Also I had to take into account move ability! What if I needed to transport my table? Being able to arrange it myself helps to. It sucks when you have something to large and to heavy to move yourself. Trust me I know. So in the light of my table being a monstrosity I have decided to divide it into parts. My 6ft table is now an 8 ft table (before corner piece) made up of 4 smaller tables that stand together. 4 tables that will measure 2ft wide, 3 1/2ft tall, and 3ft deep. 2 of them will be end cabinets with 2 adjustable shelves inside. The middle 2 will have a top drawer each and an open cubby to store BJD boxes (I currently have 4 SD and 5 MSD in 1 cubby! With Art books standing in front of them!) Also having the table in parts not only means they can be easily moved but, should I need to, arrange them differently (say in a corner).
Supplies:
Home Depo is my favorite place to shop. Lowes is okay to. For my table I Used:
Tools:
1)Table Saw (These cute straight lines fabulously, borrowed from a friend who helped me)
2)Jigsaw (For shapes. Curves and things are awesome with a jigsaw)
3)A Drill with multiple heads and screw bits
4)Hand Sander
5)Face Mask with Respirator. (Don't want to kill yourself breathing in wood dust and stain fumes)
6)Wood: For my whole project 4-5 sheets of 4ftX8ft plywood
7)Straight ruler and a pencil or chalk
8)Wood Screws and Drywall Screws
9) 400 and 600 grit sand paper and sand blocks
10)Corner/Angle Braces (cause I'm paranoid and once this goes together its not coming apart.)
11)2-3 in Foam and Bristle Brushes
12)Wood Stain (I'm thinking a nice red mahogany)
13)Finishing Glaze
14)Cute Silver Handles for the cabinets. One about 3in long
15)1/4 Shelf Pins in silver. (For the adjustable shelves!)
16)2in Broad Hinges (for the cabinet doors)
17)Decorative Wood Findings.
(And for those of you with artistic talent a dremil and wood burner are great for making designs in the wood before you stain it. I have no such talents...)
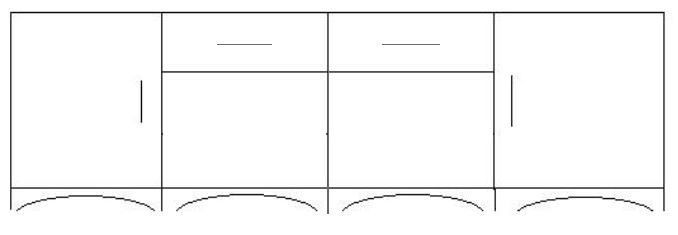
The first cabinet - to open on the right side but Same for the left
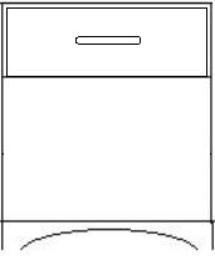
Step One! Cutting the pieces from a single 4x8 sheet

Here is a mock up of a 4x8 sheet of wood. 1 sheet gets you Most of the pieces you need.
Top/Bottom 36inx24in
Sides 36inx28in
Adjustable Holes are really a preferance thing. But I went with 3 rows of:
4in from the front and back
5in from the top and bottom
2in apart down
14in apart across
Back: (Have to remeasure)
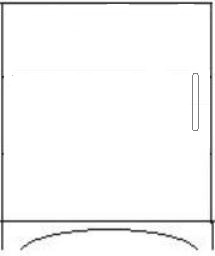
Door: 29inx24
Shelves: (Have to remeasure)
Front Foot: 24inx4in
Side Foot: 35 1/2inx 4in
Using the straight ruler and pencil mark the bottom and top on the plywood, separate and then mark the sides - Use the table saw to cut all the pieces - Some trimming will be needed but 1 sheet of 4x8 plywood will get you MOST of the piece's you need. If i had went just the littlest bit small on some of my piece's I would have got them all.
Top/Bottom 36inx24in
Sides 36inx28in
Adjustable Holes are really a preferance thing. But I went with 3 rows of:
4in from the front and back
5in from the top and bottom
2in apart down
14in apart across
Back: (Have to remeasure)
Door: 29inx24
Shelves: (Have to remeasure)
Front Foot: 24inx4in
Side Foot: 35 1/2inx 4in
Using the straight ruler and pencil mark the bottom and top on the plywood, separate and then mark the sides - Use the table saw to cut all the pieces - Some trimming will be needed but 1 sheet of 4x8 plywood will get you MOST of the piece's you need. If i had went just the littlest bit small on some of my piece's I would have got them all.

|
This is the foot piece. This is the piece that messes up that All in One thing. Once I have the size cut, I used the pencil to draw my very simple foot design - Then used the jigsaw to CAREFULLY cut out the shape. I used 400 grit sand paper to sand all my
|
pieces smooth. (this will help the wood stain to seep in better. It just seemed easier to me to sand as I cut verses after I had it all put together. However sometimes you do get a more even surface if you sand it all as one piece.)
Step Two! - From the Bottom Up!

|
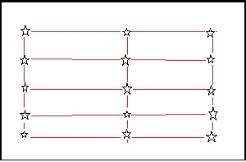
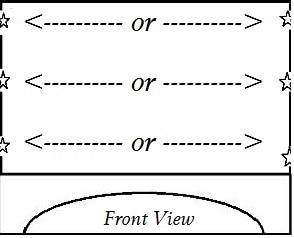
Now that I have all my pieces its time to Assemble! ( All the Stars = Screw Points)
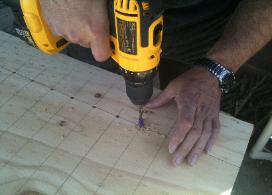
Useing the pencil to mark the width of the foot on the bottom piece edges - Mark and drill pilot holes! (Pilot Holes will help to keep the wood from splintering) This was a little tricky. You have to hold in place and drill at the |
|
same time. I lined up the feet first and drilled the pilot holes Outside cornersfirst. This way I could screw the 2 pieces togeather and that would help hold them as I drilled the rest of the pilot holes before putting the wood screws in. Then I did both side then the back.
Step Three! - Adjustable Shelve Holes
|
|
|
Like I said before I went with 3 rows of:
4in from the front and back
5in from the top and bottom
2in apart down
14in apart across
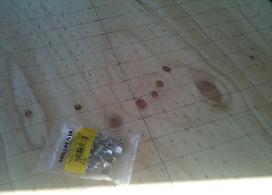
After deciding my hole pattern I used the straight ruler to mark them on the wood. Now the hard part. You don't want to drill them to deep and go all the way through the wood, nor to shallow because then the pegs wont hold. So I marked my drill bit with colored tape, then CAREFULLY! drilled to the tapes edge - This was a hugely difficult task and accidents do happen. The few times I accidentally drilled through the wood I fixed the holes by taping the pegs in one side and filling the hole with stain-able wood filler on the outside (I used a scraper to make sure I had a smooth top). Once it was dry I sanded it down to smooth it and the wood in general out. - Now that the holes were made I used the hand sander and 400 paper to take out your pencil lines on the inside.
4in from the front and back
5in from the top and bottom
2in apart down
14in apart across
After deciding my hole pattern I used the straight ruler to mark them on the wood. Now the hard part. You don't want to drill them to deep and go all the way through the wood, nor to shallow because then the pegs wont hold. So I marked my drill bit with colored tape, then CAREFULLY! drilled to the tapes edge - This was a hugely difficult task and accidents do happen. The few times I accidentally drilled through the wood I fixed the holes by taping the pegs in one side and filling the hole with stain-able wood filler on the outside (I used a scraper to make sure I had a smooth top). Once it was dry I sanded it down to smooth it and the wood in general out. - Now that the holes were made I used the hand sander and 400 paper to take out your pencil lines on the inside.
Step Four! - The Side and Back and Top

|

|
|
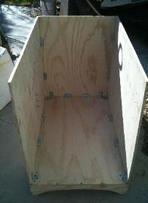
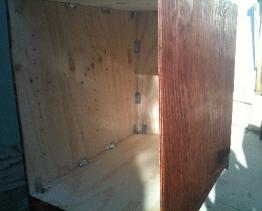
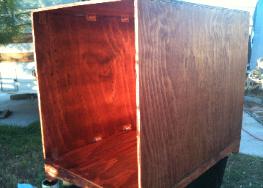
This part took 2 people since I was using corn braces. 1 person to hold in place and 1 person to man the drill. Taking one of the side pieces and lining it up with the bottom edge (holes facing in wards) - I asked James (My Male Model in all these pictures) to hold it in place - Now I aligned the angles and screwed them into place (I used 4) - Did the same for the other side - The back is a little trickier. Setting the back into place and holding it firmly - I drilled pilot holes through the side into the back piece. Screw together. Now the sides and back are firmly attached. But for a little extra precaution I added corner angles to hold the back to the bottom table. Align top with sides and hold firmly in place - Again I CAREFULLY drilled the pilot holes and screwed it into place. And since I didn't want a bunch of screw heads to bee seen (No matter I was using black screws and a dark stain) I covered them up with the stain-able wood filler!
Step Five! - More Shelves!!
(I had to get another sheet of wood for Steps 6 and 7)
Making sure my shelve measurements are still correct, whether the shelves will slide in easily or not, and Remeasuring just to make sure. I cut my shelve and sand with 400 paper.
Making sure my shelve measurements are still correct, whether the shelves will slide in easily or not, and Remeasuring just to make sure. I cut my shelve and sand with 400 paper.
Step Six! - The Door
|
|
Like the shelve I remeasured the space. From edge to edge the door should cover the entire open area! No gaping! Also I used a corner cutter to round the door edges on the front side. It was a last minute decision that was only made possible because James (My wonderful assistant!) happen to have one!
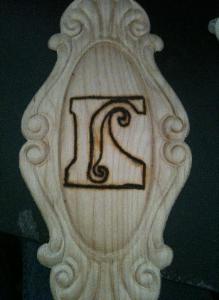
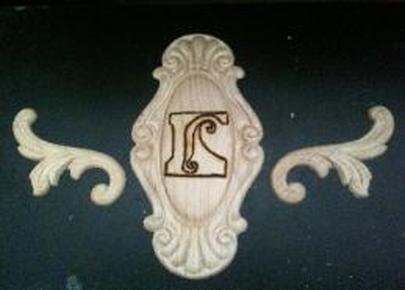
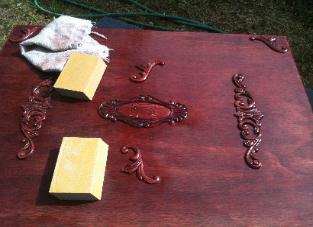
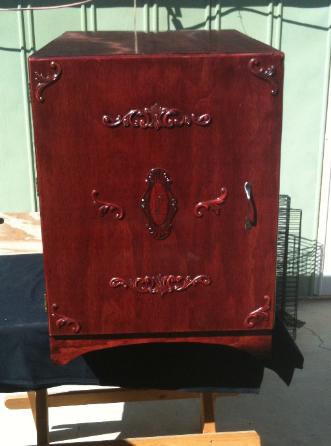
This is my center door display!! These pieces were found at Michaels Crafts. And since I didn't want it to be plain looking but couldn't think of an original motif design (since I have a distinct lack of artistic talent, I needed something easy) I just went with the Luts logo L.
It took me an hour to burn into the wood. I used a sharpie, tracing paper, a universal tip wood burner. It looks a lot better from afar (and in these photos) than it does close up. After staining them to match the door and attaching them with wood glue I discovered the hard way that you should clear coat the door and the decorative pieces SEPARATELY. I did it all at once and had a hell of a time getting the clear to coat evenly. It was a Nightmare. A NIGHTMARE!!!
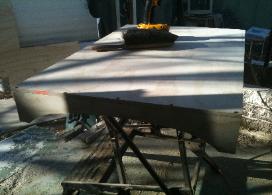
Step Seven! - Staining and Glossing
|
|
|
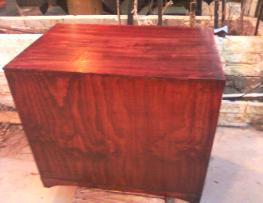
Staining is both easy and hard. It's repetitive. Always wear a face mask with respirator. Using a brush (foam and bristle) I evenly spread the stain. Don't Stop Mid Stroke! This can leave blotches or light spots that will need to be sanded out. After every stroke wait a minute and then wipe the stain off with a cloth or towel. The stain darkens the longer you let it sit. But don't let it sit so long that it drys. Watch out for build up as well. Repeat until entirely stained and the color you want. Both inside and out. (See that's TOUGH!) I had to crawl inside to do that! And wear cloths you wont miss if they get stain on them. Oil base stain does not come out easily if at all. My poor shirt looked like I had been murdered in it.
Apply clear finish with a bristle brush. Evenly coat with full strokes. Add as many layers as you like. It all just depends on the clear finish your using. More coats of a glossy finish will make it shinier, it will reflect more light. In between layers give it a little sanding with a hand block sander. This will even ridges and exspose air bubbles that need to be sanded open and re-coated. If the clear coat begins to turn white, stop and buff it back clear.
For decorative pieces it's just easier to stain and gloss before even attaching them to door or other parts of the table.
|
|
For decorative pieces: These are sometimes a little harder to stain. I figured this little trick! I waited until the stain is almost congealed on the piece and then use more stain to re-wet the stain and Then wiped off. Also don't apply these to door until both are stained and glosssed! And I added a cute litte handle!
Step Eight! - Attaching the Door!
|

|
Evenly space the hinges and screw onto edges of opening. This was again a two person job. While 1 person holds the door in an open position the second person may screw the hinges into place
Extra:
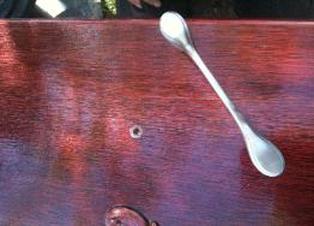
Push Magnet Fixture: This type of closure may be added once the door is attached.
After I was all done and proud of my work (Like a week later) realized my hinges were holding the door just so. I mean that it opened to easily? That the hinges held it in such a way that if I bumped the table the door would open slightly. So decided to add a magnet closure! Nothing to fancy. (I butchered the poor bathroom cabinet for it) So now at the very top corner the two magnets touch to hold the door closed.
Extra:
Push Magnet Fixture: This type of closure may be added once the door is attached.
After I was all done and proud of my work (Like a week later) realized my hinges were holding the door just so. I mean that it opened to easily? That the hinges held it in such a way that if I bumped the table the door would open slightly. So decided to add a magnet closure! Nothing to fancy. (I butchered the poor bathroom cabinet for it) So now at the very top corner the two magnets touch to hold the door closed.
Ta Da!! Finished Cabinet One!!!
the first drawer cubby!
The First Drawer! Originally I thought about doing 3 drawers in these sections..... But I have No Need for so many drawers! At least not yet! If I do later its not hard to add more.
Step One! - Cutting the Pieces

|

|
Here is the mock up of a 4x8 sheet of wood that I used for Part 1. Use the same Measurements!
Drawer (Measurements to be added once I find where I put them....)
Sides:
Bottom:
Front/Back:
You will need drawer slides. I used ?Ft Slides.
For this Middle Piece your basically just re-doing most of the steps for Part One.
Step One
Step Two
Step Four
Step Seven
Optional!
Now here you have a choice. You can either put in another adjustable shelf or a drawer. I went with a drawer. Unfortunately I did not take pictures as I made this..... But it's pretty EASY! I think!
Step Two! - Making the Sliding Drawer

|


|
So I started with the Bottom. Taking the front I marked on the wood the inside edge for the front and back. Then I did the same with the sides. Then Match the front edge with the bottom front edge. Screw into place. Then mark and pre-pilot hole the front sides. Match up the side with the front and bottom edges and pilot hole then screw into place. Repeat with other side. Then match the back with the side and bottom edges and screw into place! Also! Add a cute handle! And as is becoming habit add a little magnet stay.
Now position the drawer slides center on the sides of the drawer with the slide extending back.
Now position the drawer slides center on the sides of the drawer with the slide extending back.

Now I did it this way because the wood was a bit warped but still straight to the eyes. At this point I once again needed James wonderful help. With him holding the drawer I crawled inside the table box and screwed the extended slide to the inside of the table. This can be a long, Agonizing, process. Any little shift in the person holding the drawer can throw the whole thing off!
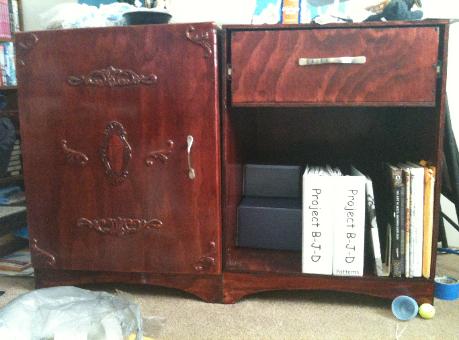
My Table in Use so far! sorry about the mess around it...